Updating: JPMN
This section is dedicated to updating the JPMN template in Anki.
Preliminary steps
-
Ensure that your note is named exactly
JP Mining Note. To do this, head over to:(Main Window) →
Tools→Manage Note Types.If your note is named differently, please rename it to
JP Mining Note. -
Please make a backup of your entire Anki collection, if you haven't already.
Updating the Note
You can update the note in one of two ways:
- Via JPMN Manager, an Anki add-on. If you don't know which method to choose, choose this one.
- Via command line.
This method is recommended for people who are familiar with
gitandpython, and don't want to download an Anki add-on.
Option 1: Via JPMN Manager (click here)
This add-on simply wraps around the python script mentioned below, and should behave the exact same as running the script manually.
Video demo (click here)
- If you haven't installed the JPMN Manager add-on yet, do so with the following code:
1732829476. Be sure to restart Anki after installing. -
Make sure there is something to update to in the first place. You can do this by:
(Main Window) →
Tools→JPMN Manager→Check for note updates -
Update the note by navigating to the following:
(Main Window) →
Tools→JPMN Manager→Update jp-mining-note -
You may see additional instructions. If you do, please continue the updating process with the Setup Changes page
There may be further steps outside of just updating the card, such as updating Yomichan's templates / format. These should be recorded in the Setup Changes page.
Afterward seeing that page, please view the final steps section.
Option 2: Via Command Line (click here)
:: assuming you are at the root of the repo, i.e. after the following commands:
::  $ git clone https://github.com/Aquafina-water-bottle/jp-mining-note.git
::  $ cd jp-mining-note

:: grabs the latest version of the master branch
:: NOTE: use the `testing` branch if you want to install pre-releases, i.e.
::git checkout testing
git pull --force

:: Make sure you have Anki open and Anki-Connect installed!
:: Also ensure that your python version is 3.9 or higher.
python tools\install.py
# assuming you are at the root of the repo, i.e. after the following commands:
#  $ git clone https://github.com/Aquafina-water-bottle/jp-mining-note.git
#  $ cd jp-mining-note

# grabs the latest version of the master branch
# NOTE: use the `testing` branch if you want to install pre-releases, i.e.
#git checkout testing
git pull --force

# Make sure you have Anki open and Anki-Connect installed!
# Also ensure that your python version is 3.9 or higher.
python3 tools/install.py
There may be further steps outside of just updating the card, such as updating Yomichan's templates / format. These should be recorded in the Setup Changes page.
Afterward seeing that page, please view the final steps section.
Why can't I just copy/paste the templates, or just re-install the .apkg file to update the note?
In short, updating via Anki or Python performs many operations that cannot be done with a simple note transfer. Most importantly, there are operations (usually under batch.py) that change the data within the actual fields themselves, and these are ran automatically on note update. If you attempt to update your note manually, these actions will not be ran, and can result in unwanted changes to your note!
Additionally, many manual operations are done for you by updating the note with the Python script, such as automatically creating and re-arranging new fields.
If you still want to attempt manually updating the note, then there will be little to no support given.
Common Errors
This section will document common errors that occur when attempting to update the note.
Anki-Connect is missing actions
Anki-Connect is likely outdated. To fix this, remove and re-download Anki-Connect from the AnkiWeb page.
Note
It seems that the Check for Updates occasionally fails to update the add-on,
despite the fact that a newer version of the add-on exists.
That is why I recommend re-downloading from the AnkiWeb page
instead of using this feature.
FieldVerifierException
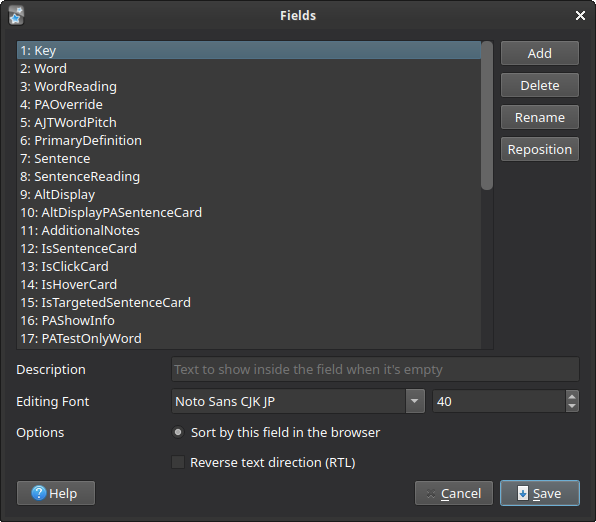
This class of errors means that the field list was edited at some point after the installation or last update of JPMN. The field list can be accessed by navigating to the following:
(Main window) →
Browse→Fields....
The installation script is picky about fields and its order, and by default, the script will reject any note type with modifications to the field list.
To fix this, there are a few cases to go through.
The field order has been changed.
If the field order has been changed, and nothing else has been changed,
you should be able to preserve your existing field list order by running the installation script
with the --ignore-order flag:
Alternatively, you can re-order the field list beforehand. This can be done with the following batch command:
New field(s) have been created.
You have two options. Neither of these will delete your existing field(s).
-
If you want to preserve your existing field list order, then you can run the script with the
--ignore-orderflag, like above. -
If you want to have the field list order match exactly with the current note, then re-order all the new fields to be below the last
Commentfield. Of course, this can be a temporary move; you can move the fields back to their previous positions after the update.Note
On rare occasions, you might have added a field that serves the same purpose as a field that will be created on update. If so, rename your field to the field that will be added, and move the field under the
Commentfield.For example, if your note doesn't have
PAPositionsbut you added a fieldPositionsthat fulfills the same purpose, then renamePositionstoPAPositions.
Field(s) were removed or renamed.
Unfortunately, there is no way to ignore removed or renamed fields. If you removed a field, please re-add the field. Likewise, if you renamed a field, please rename it back to the original name. See here for more info on why they cannot be ignored.